
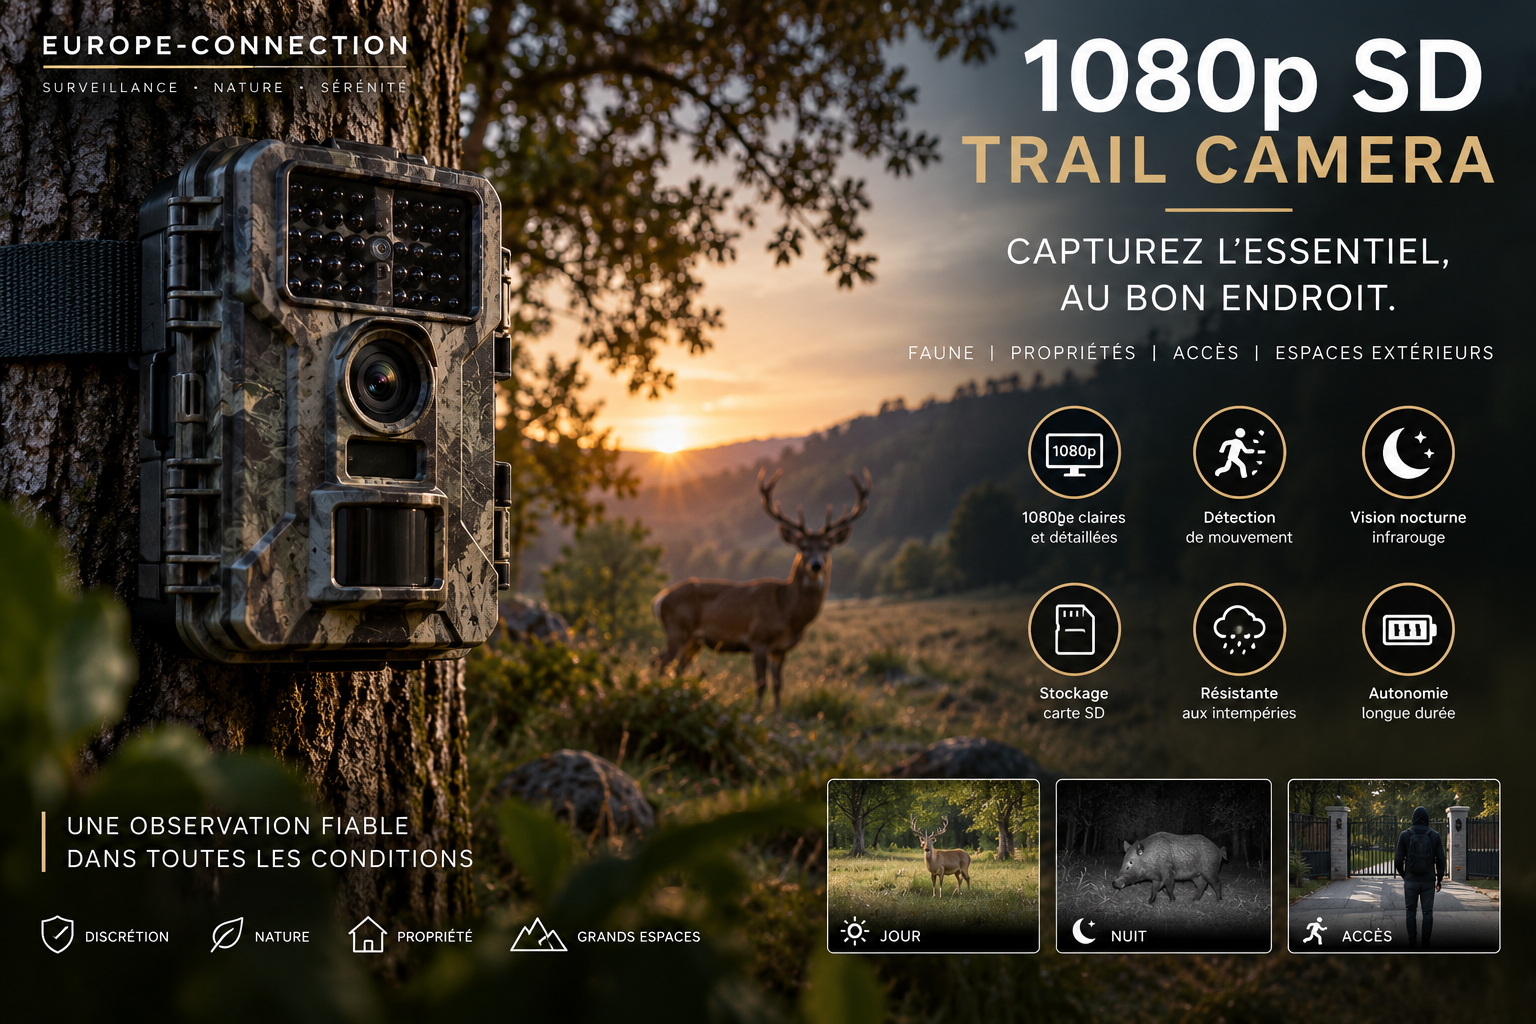
- A trail-camera format for a single, well-chosen observation point
- Why 1080p is the feature that defines this product presentation
- Choose the scene before choosing the mounting position
- Think in routes, not in open space
- Protect privacy by designing the frame carefully
- What the “SD trail camera” designation means for the workflow
- When this product is a better fit than a connected camera
- A practical deployment checklist for the right use
- Our verdict: choose it for clear, local outdoor observation
- Frequently Asked Questions
1080p SD Trail Camera: a purposeful choice for fixed outdoor observation
Outdoor observation does not always call for a permanently connected camera system. Sometimes the requirement is more focused: document activity at one defined point, retain a clear visual record and review what happened without turning a small monitoring need into a full CCTV project. That is exactly the territory of our 1080p SD Trail Camera.
This is not an indoor concealed-object camera repurposed for a garden, a driveway or a remote access point. It belongs to our outdoor and hunting camera selection, making it the relevant product category when the scene itself is outdoors. Its defining verified video characteristic is 1080p. In practical terms, that resolution keeps the product centred on visual clarity: the camera is there to create footage that can be reviewed meaningfully after a legitimate event, rather than merely confirming that something moved in front of a lens.
For a property owner monitoring their own boundary, a land manager observing a permitted route, or a wildlife observer working on land where they are authorised to film, the key question is not “which camera has the longest feature list?” It is “what must this camera help me establish at this specific location?” The 1080p SD Trail Camera is the answer when the observation point is defined and usable image detail is the priority.
A trail-camera format for a single, well-chosen observation point
A trail camera should be selected from the scene backwards. Start with the place that matters: an entrance to private land, a gate, a track across managed grounds, a storage-area approach, or an area used for lawful wildlife observation. Each is a point of passage rather than a room. The camera’s task is therefore to provide a visual account of activity through that point.
That distinction matters because an outdoor observation camera and an indoor hidden camera solve different problems. A concealed clock-style model, for example, is chosen for an indoor environment where the object format is part of the deployment. An outdoor trail camera belongs in a setting where the monitoring objective is connected to a route, a boundary or a location exposed to natural surroundings. Within our broader spy camera range, choosing the right camera family before comparing specifications prevents a mismatched installation.
The 1080p SD Trail Camera is particularly relevant where the footage will be reviewed to answer straightforward questions: Was there activity at the point? What direction did it take? What was present in the scene? Did the event occur in the area the camera was intended to cover? These are practical questions, and they rely on a camera being positioned around the actual route of interest—not simply placed where it is easiest to reach.
Why 1080p is the feature that defines this product presentation
“1080p” is often treated as a simple headline specification. In a trail-camera deployment, it has a more concrete role. It is the video-resolution standard that frames expectations for the footage you will later need to inspect. Resolution does not replace sensible positioning, but it establishes the level of recorded detail from which that positioning can deliver value.
For this product, 1080p makes sense when the aim is recognisable, reviewable visual documentation of a selected outdoor scene. It is a practical resolution for users who need more than a vague indication that activity occurred. The value is not in pursuing technical numbers for their own sake; it is in choosing a format that supports a clear observation objective.
That objective should be stated before deployment. For example:
- observing wildlife movement on land where filming is permitted;
- checking activity at the entrance to a privately managed outdoor area;
- documenting access to a privately owned storage location or outbuilding approach;
- reviewing traffic through a defined path, gate or passage on property under your control.
In every case, 1080p supports the same discipline: focus the camera on the relevant zone and make sure the frame is useful for the question you need answered. A broad, unfocused landscape may look impressive, but it often produces less actionable footage than a properly selected point of passage.
Choose the scene before choosing the mounting position
The most productive trail-camera setup begins with observation logic, not with a mounting surface. Walk the site and identify the line of travel you want to document. Then assess the background, the approach to the camera and the edges of the intended frame. The goal is to create a scene with a clear purpose, rather than recording every possible direction at once.
Think in routes, not in open space
For outdoor use, routes tell the story. A gate line, a narrow access track, a pathway between buildings or a habitual wildlife corridor gives the camera a defined job. When a subject passes through a controlled visual area, the 1080p recording capability is used to best effect. By contrast, a camera aimed at a large open area can make the decisive action occupy only a small portion of the image.
Where an outdoor area needs broader, continuous site coverage rather than point observation, the requirement may be better aligned with a dedicated video surveillance system. That is not a question of one category being universally better than another. It is a question of matching the equipment to the monitoring model: a defined outdoor point for a trail camera, or a wider security architecture for a permanent surveillance installation.
Protect privacy by designing the frame carefully
Outdoor camera use must be lawful and proportionate. On private land, aim the camera at the area you are entitled to monitor and keep the field of view tied to that purpose. Avoid filming neighbouring private spaces, public areas or places where people reasonably expect privacy. A camera should document a legitimate site concern, not create indiscriminate observation.
This is especially important when a monitored route sits near a boundary. The strongest deployment is usually the most specific one: a view that answers a legitimate property, land-management or wildlife-observation question while reducing incidental capture beyond the target area. For a practical legal framework across jurisdictions, consult our spy camera laws resource before putting any camera into service.
What the “SD trail camera” designation means for the workflow
The product is named the 1080p SD Trail Camera, and that name immediately signals a trail-camera workflow rather than an indoor smart-camera narrative. The working routine is straightforward in principle: deploy for the lawful observation purpose, return to the camera as appropriate for the site and review the recorded material in an organised way.
That workflow changes how the camera should be planned. Instead of thinking only about live monitoring, think about retrieval and review. Consider who is authorised to access the footage, how recordings will be labelled after collection and how long material needs to be retained for the legitimate reason it was captured. Good footage loses operational value if it cannot later be associated with the location and time period it was meant to document.
For users building an orderly evidence or observation routine, it is also sensible to plan the storage side of the deployment at the outset. Our memory storage section is the logical place to prepare the wider storage requirement alongside the camera itself. This keeps the project focused on a complete review process rather than treating storage as an afterthought.
When this product is a better fit than a connected camera
The 1080p SD Trail Camera is a purposeful alternative when a site does not need the same approach as an indoor Wi-Fi camera or a remotely connected surveillance device. Connected cameras are often selected around network access, remote viewing and an always-on management routine. A trail-camera deployment begins with the physical site and a defined observation point.
That makes this product particularly coherent for users who do not need to turn an outdoor observation task into a networked camera project. It also keeps the buying decision clear: select the camera for the scene and the footage requirement, rather than acquiring connectivity features that do not serve the task.
Conversely, if the central requirement is to view a camera remotely as part of a connected installation, start with the relevant category rather than forcing a trail-camera choice. Europe-Connection’s Wi-Fi spy camera selection addresses a different use case. If the challenge is remote coverage where Wi-Fi is not the chosen connection model, a 4G spy camera approach is likewise a separate product decision.
This distinction is useful because it avoids buying by label alone. “Outdoor” describes the environment; “1080p” describes the recorded video resolution; and the trail-camera format identifies the product’s operational context. Together, these elements point to a fixed, deliberate outdoor observation setup.
A practical deployment checklist for the right use
Before installing the 1080p SD Trail Camera, establish the monitoring purpose in one sentence. If that sentence is vague, the setup is likely to be vague too. “Observe lawful wildlife activity through this route” or “document access through this private gate” are clear objectives. They tell you where the camera belongs and what a useful recording should show.
- Define the authorised area. Identify the part of the property or land you are entitled to observe.
- Select one event zone. Choose the gate, path, entrance or corridor where activity will be meaningful.
- Set the frame around the zone. Prioritise the route itself rather than an unnecessarily broad view.
- Plan the review routine. Decide how footage will be collected, reviewed and recorded for the legitimate purpose of the installation.
- Keep the deployment proportionate. Adjust the position whenever the frame captures more than the authorised objective requires.
These are not cosmetic steps. They are what transform a camera into a reliable observation tool. A carefully scoped installation is easier to operate, easier to review and easier to justify.
Our verdict: choose it for clear, local outdoor observation
We selected the 1080p SD Trail Camera for customers who need an outdoor trail-camera format with 1080p video at the centre of the decision. It is the right product to consider when the requirement is to document a specific, lawful outdoor point of interest and preserve footage that can be reviewed with useful visual clarity.
Do not approach it as a substitute for every type of surveillance camera. Use it where a trail-camera workflow and a fixed observation point are the natural answer: managed land, a private access route, a boundary feature or an authorised wildlife-monitoring location. Define the scene, respect privacy, organise the review process and let the 1080p recording capability serve a precise operational purpose.
Explore the product directly here: 1080p SD Trail Camera.
Frequently Asked Questions
What is the 1080p SD Trail Camera designed for?
The 1080p SD Trail Camera is designed for fixed outdoor observation at one defined point. It is intended to document activity at locations such as a private gate, managed access track, storage-area approach, boundary feature, or authorised wildlife route. Its purpose is to create recorded footage that can be collected and reviewed afterwards, rather than providing a permanently connected CCTV-style system.
What does 1080p mean for this trail camera?
1080p is the verified video-resolution characteristic presented for this camera. It supports clear, reviewable visual documentation of a selected outdoor scene, helping users inspect more than a simple indication that movement occurred. Resolution does not replace careful placement, however. The camera should still be positioned so that the relevant route or event zone occupies a useful part of the frame.
Where should a trail camera be placed for effective observation?
Place it around the actual route or point of passage you need to document. Suitable areas include a gate line, narrow access track, path between buildings, private-land entrance, or habitual wildlife corridor. Start by identifying the line of travel, then assess the background, the subject’s approach, and the frame edges. A clearly defined route generally produces more useful footage than a broad, unfocused view.
Is this camera suitable for wide-area security coverage?
This camera is intended for observation of a defined outdoor point, not for broad and continuous site coverage. When the objective is to document movement through a gate, path, or access route, a trail-camera format is appropriate. If a location requires wider, continuous coverage as part of a permanent security architecture, a dedicated video surveillance system may be a better match for that monitoring model.
How is an SD trail camera different from a connected camera?
An SD trail camera is planned around deployment, footage retrieval, and later review at a physical observation point. A connected camera is commonly selected for network access, remote viewing, and an always-on management routine. The 1080p SD Trail Camera suits users who need local outdoor observation without turning the task into a networked camera project. Wi-Fi and 4G camera options address separate remote-viewing use cases.
What types of lawful outdoor observation can this camera support?
The camera can support authorised wildlife observation, monitoring activity at an entrance to privately managed land, documenting access to a privately owned storage location, or reviewing traffic through a defined route on property under your control. The observation purpose should be specific before deployment, such as documenting access through a private gate or observing wildlife movement along a permitted route.
How should privacy be protected when installing an outdoor trail camera?
Aim the camera only at the area you are entitled to monitor and keep its field of view connected to a legitimate purpose. Avoid filming neighbouring private spaces, public areas, and places where people reasonably expect privacy. Near a boundary, keep the frame as specific as possible. A proportionate setup documents the relevant route or property concern while reducing incidental capture outside the target area.
What should be considered before mounting the camera?
Before mounting, define the monitoring purpose in one sentence and identify the authorised area. Select one meaningful event zone, such as a gate, path, entrance, or corridor. Build the frame around that zone instead of trying to record every direction at once. Also consider the background, approach direction, and frame edges so that the footage will address the question the camera was installed to answer.
How should recorded footage be managed?
Plan the retrieval and review routine before deployment. Decide who is authorised to access recordings, how footage will be labelled after collection, and how long it must be retained for the legitimate reason it was captured. Footage is more useful when it can be linked clearly to the location and time period it was intended to document. Storage should be considered as part of the overall setup.
Why is a narrow route often better than an open landscape for a trail camera?
A narrow route, gate line, access track, or wildlife corridor gives the camera a defined job. When activity passes through a controlled visual area, the 1080p recording capability can be used more effectively. In a large open landscape, the important action may occupy only a small part of the image, making the recording less useful for reviewing the event that matters.
When is the 1080p SD Trail Camera the right choice?
It is a suitable choice when you need to document a specific lawful outdoor point of interest and later review footage with useful visual clarity. It fits managed land, a private access route, a boundary feature, an outbuilding approach, or an authorised wildlife-monitoring location. It should not be treated as a substitute for every surveillance camera type, especially where remote viewing or broad continuous coverage is the primary requirement.



Comments (0)
Post a comment